环境:
准备了三台centos7虚拟机:192.168.213.4、192.168.213.5、192.168.213.6。
一、安装
三台虚拟机都安装下面的步骤执行,安装Nginx,为后面的使用演示使用。
1、安装必备组件:
sudo yum install yum-utils
2、配置yum源
在下面的文件目录中创建nginx.repo,并将nginx.repo内容填写进去。
vim /etc/yum.repos.d/nginx.repo
nginx.repo内容
[nginx-stable]
name=nginx stable repo
baseurl=http://nginx.org/packages/centos/$releasever/$basearch/
gpgcheck=1
enabled=1
gpgkey=https://nginx.org/keys/nginx_signing.key
module_hotfixes=true

[nginx-mainline]
name=nginx mainline repo
baseurl=http://nginx.org/packages/mainline/centos/$releasever/$basearch/
gpgcheck=1
enabled=0
gpgkey=https://nginx.org/keys/nginx_signing.key
module_hotfixes=true
默认情况下,使用稳定版nginx包的存储库。如果想使用mainline版本的nginx包,运行以下命令:
sudo yum-config-manager --enable nginx-mainline
3、安装nginx
sudo yum install nginx
启动:
systemctl start nginx
设置开机启动:
systemctl enable nginx
访问:http://192.168.213.5/

常用基本操作命令:
nginx -t -c conf/nginx.conf # 检测配置文件是否正常
nginx -s reload -c conf/nginx.conf # 修改配置后平滑重启
nginx -s quit # 优雅关闭Nginx,会在执行完当前的任务后再退出
nginx -s stop # 强制终止Nginx,不管当前是否有任务在执行
二、使用
Nginx配置文件存放的路径:
/etc/nginx
查询nginx相关的文件存放路径:
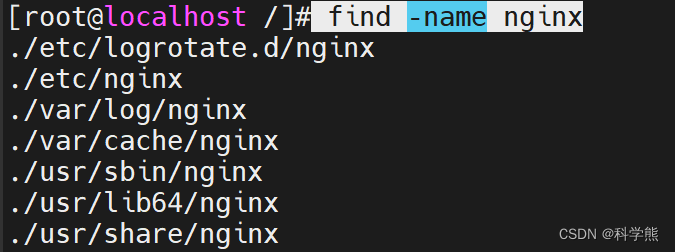
切换到跟目录:
cd /
查询:
find -name nginx
1、静态资源
cd /etc/nginx
/etc/nginx/conf.d目录中的default.conf是默认的配置,如下,静态资源默认存放于/usr/share/nginx/html。
server {
    listen       80;
    server_name  localhost;

    #access_log  /var/log/nginx/host.access.log  main;

    location / {
        root   /usr/share/nginx/html;
        index  index.html index.htm;
    }

    #error_page  404              /404.html;

    # redirect server error pages to the static page /50x.html
    #
    #error_page   500 502 503 504  /50x.html;
    #location = /50x.html {
    #   root   /usr/share/nginx/html;
    #}

    # proxy the PHP scripts to Apache listening on 127.0.0.1:80
    #
    #location ~ \.php$ {
    #    proxy_pass   http://127.0.0.1;
    #}

    # pass the PHP scripts to FastCGI server listening on 127.0.0.1:9000
    #
    #location ~ \.php$ {
    #    root           html;
    #    fastcgi_pass   127.0.0.1:9000;
    #    fastcgi_index  index.php;
    #    fastcgi_param  SCRIPT_FILENAME  /scripts$fastcgi_script_name;
    #    include        fastcgi_params;
    #}

    # deny access to .htaccess files, if Apache's document root
    # concurs with nginx's one
    #
    #location ~ /\.ht {
    #    deny  all;
    #}
}
进入/usr/share/nginx/html,修改index.html:
效果入下:

三台nginx均修改上面的效果,后面演示要用。
备份配置:
cp nginx.conf nginx.conf.bk

2、Nginx反向代理-负载均衡
192.168.213.4作为反向代理-负载均衡,192.168.213.5、192.168.213.6作为web服务器。
192.168.213.4配置反向代理-负载均衡:
upstream web_server {
   # 30s内检查心跳发送两次包,未回复就代表该机器宕机,请求分发权重比为1:2
   server 192.168.213.5 weight=100 max_fails=2 fail_timeout=30s;
   server 192.168.213.6 weight=200 max_fails=2 fail_timeout=30s;
}


server {
    listen       80;
    server_name  localhost;

    #access_log  /var/log/nginx/host.access.log  main;

    location / {
        root   /usr/share/nginx/html;
        index  index.html index.htm;
    }

     location ~* ^/web/ {
        #转发时去掉/web
        rewrite ^/web/(.*) /$1 break;
        root   html;
        # 配置一下index的地址
        index  index.html index.htm index.jsp index.ftl;
        proxy_set_header Host $host;
        proxy_set_header X-Real-IP $remote_addr;
        proxy_set_header X-Forwarded-For $proxy_add_x_forwarded_for;
        # 请求交给名为nginx_boot的upstream上
        proxy_pass http://web_server;
    }

    #error_page  404              /404.html;

    # redirect server error pages to the static page /50x.html
    #
    error_page   500 502 503 504  /50x.html;
    location = /50x.html {
        root   /usr/share/nginx/html;
    }

    # proxy the PHP scripts to Apache listening on 127.0.0.1:80
    #
    #location ~ \.php$ {
    #    proxy_pass   http://127.0.0.1;
    #}

    # pass the PHP scripts to FastCGI server listening on 127.0.0.1:9000
    #
    #location ~ \.php$ {
    #    root           html;
    #    fastcgi_pass   127.0.0.1:9000;
    #    fastcgi_index  index.php;
    #    fastcgi_param  SCRIPT_FILENAME  /scripts$fastcgi_script_name;
    #    include        fastcgi_params;
    #}

    # deny access to .htaccess files, if Apache's document root
    # concurs with nginx's one
    #
    #location ~ /\.ht {
    #    deny  all;
    #}
}
测试:
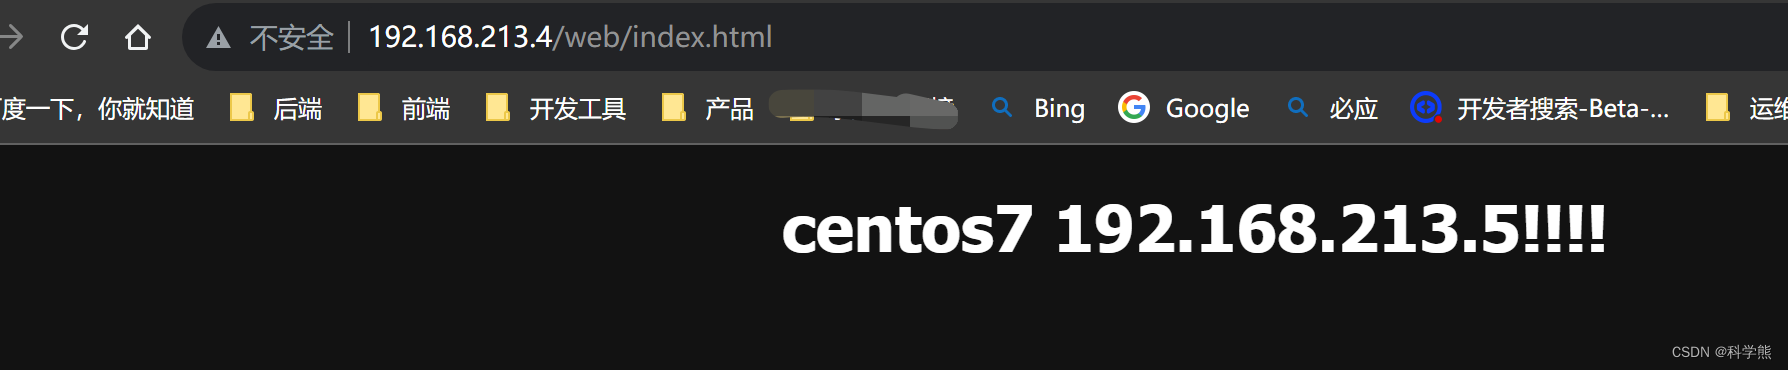
正常情况下,访问http://192.168.213.4/web/index.html
关闭
192.168.213.6后测试,只能访问到192.168.213.5。
关闭命令:
systemctl stop nginx

3、资源压缩
在Nginx提供了三个支持资源压缩的模块ngx_http_gzip_module、ngx_http_gzip_static_module、ngx_http_gunzip_module,其中ngx_http_gzip_module属于内置模块,代表着可以直接使用该模块下的一些压缩指令,后续的资源压缩操作都基于该模块,先来看看压缩配置的一些参数/指令:
| 参数项 | 释义 | 参数值 |
|---|---|---|
| gzip | 开启或关闭压缩机制 | on/off; |
| gzip_types | 根据文件类型选择性开启压缩机制 | image/png、text/css… |
| gzip_comp_level | 用于设置压缩级别,级别越高越耗时 1~9(越高压缩效果越好) | |
| gzip_vary | 设置是否携带Vary:Accept-Encoding头域的响应头部 | on/off |
| gzip_buffers | 设置处理压缩请求的缓冲区数量和大小 数量 大小 | 如16 8k |
| gzip_disable | 针对不同客户端的请求来设置是否开启压缩 | 如 .Chrome. |
| gzip_http_version | 指定压缩响应所需要的最低HTTP请求版本 | 如1.1 |
| gzip_min_length | 设置触发压缩的文件最低大小 | 如512k; |
| gzip_proxied | 对于后端服务器的响应结果是否开启压缩 | off、expired、no-cache… |
了解了Nginx中的基本压缩配置后,接下来可以在Nginx中简单配置一下:
http{
    # 开启压缩机制
    gzip on;
    # 指定会被压缩的文件类型(也可自己配置其他类型)
    gzip_types text/plain application/javascript text/css application/xml text/javascript image/jpeg image/gif image/png;
    # 设置压缩级别,越高资源消耗越大,但压缩效果越好
    gzip_comp_level 5;
    # 在头部中添加Vary: Accept-Encoding(建议开启)
    gzip_vary on;
    # 处理压缩请求的缓冲区数量和大小
    gzip_buffers 16 8k;
    # 对于不支持压缩功能的客户端请求不开启压缩机制
    gzip_disable "MSIE [1-6]\."; # 低版本的IE浏览器不支持压缩
    # 设置压缩响应所支持的HTTP最低版本
    gzip_http_version 1.1;
    # 设置触发压缩的最小阈值
    gzip_min_length 2k;
    # 关闭对后端服务器的响应结果进行压缩
    gzip_proxied off;
}
在上述的压缩配置中,最后一个gzip_proxied选项,可以根据系统的实际情况决定,总共存在多种选项:
- off:关闭Nginx对后台服务器的响应结果进行压缩。
- expired:如果响应头中包含Expires信息,则开启压缩。
- no-cache:如果响应头中包含Cache-Control:no-cache信息,则开启压缩。
- no-store:如果响应头中包含Cache-Control:no-store信息,则开启压缩。
- private:如果响应头中包含Cache-Control:private信息,则开启压缩。
- no_last_modified:如果响应头中不包含Last-Modified信息,则开启压缩。
- no_etag:如果响应头中不包含ETag信息,则开启压缩。
- auth:如果响应头中包含Authorization信息,则开启压缩。
- any:无条件对后端的响应结果开启压缩机制。
4、IP黑白名单
Nginx做黑白名单机制,主要是通过allow、deny配置项来实现:
allow xxx.xxx.xxx.xxx; # 允许指定的IP访问,可以用于实现白名单。
deny xxx.xxx.xxx.xxx; # 禁止指定的IP访问,可以用于实现黑名单。
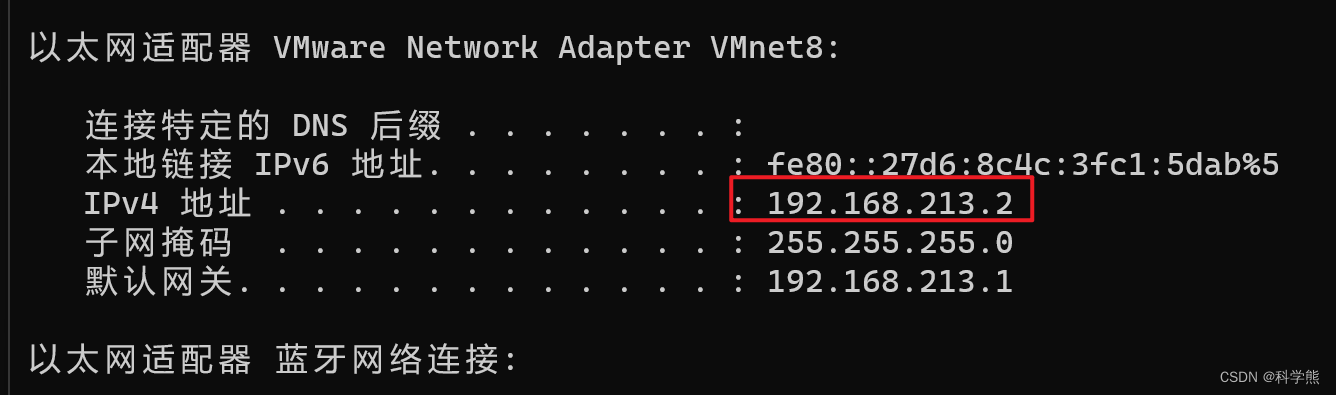
操作的服务器为:192.168.213.4
宿主机IP:192.168.213.2
白名单演示:
在目录/etc/nginx/conf.d,创建whiteIP.conf白名单配置文件。
allow 192.168.213.2; #允许192.168.213.2访问
deny all;#除开上述IP,其他IP全部禁止访问
重启,测试。
宿主机IP:192.168.213.2
宿主机请求测试
192.168.213.5请求测试:
curl http://192.168.213.4/web/index.html
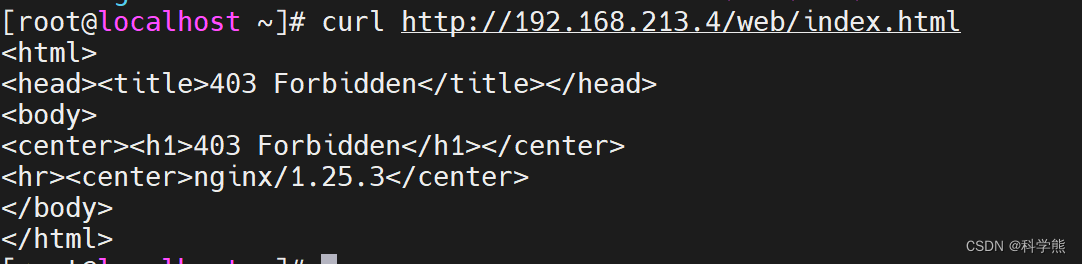
黑名单配置:
deny 192.168.213.5; # 屏蔽192.168.213.5访问
deny 192.168.213.6; # 屏蔽192.168.213.6访问
deny 127.0.0.0/8; # 屏蔽127.0.0.1到127.255.255.254网段中的所有IP访问
分别将要禁止/开放的IP添加到对应的文件后,可以再将这两个文件在nginx.conf中导入:
http{
    # 屏蔽该文件中的所有IP
    include /soft/nginx/IP/BlocksIP.conf;
 server{
    location xxx {
        # 某一系列接口只开放给白名单中的IP
        include /soft/nginx/IP/blockip.conf;
    }
 }
}
5、跨域配置
跨域配置使用的比较多,配置起来也简单。
跨域问题产生的原因:
产生跨域问题的主要原因就在于同源策略,为了保证用户信息安全,防止恶意网站窃取数据,同源策略是必须的,否则cookie可以共享。由于http无状态协议通常会借助cookie来实现有状态的信息记录,例如用户的身份/密码等,因此一旦cookie被共享,那么会导致用户的身份信息被盗取。同源策略主要是指三点相同,协议+域名+端口 相同的两个请求,则可以被看做是同源的,但如果其中任意一点存在不同,则代表是两个不同源的请求,同源策略会限制了不同源之间的资源交互。
location / {
    # 允许跨域的请求,可以自定义变量$http_origin,*表示所有
    add_header 'Access-Control-Allow-Origin' *;
    # 允许携带cookie请求
    add_header 'Access-Control-Allow-Credentials' 'true';
    # 允许跨域请求的方法:GET,POST,OPTIONS,PUT
    add_header 'Access-Control-Allow-Methods' 'GET,POST,OPTIONS,PUT';
    # 允许请求时携带的头部信息,*表示所有
    add_header 'Access-Control-Allow-Headers' *;
    # 允许发送按段获取资源的请求
    add_header 'Access-Control-Expose-Headers' 'Content-Length,Content-Range';
    # 一定要有!!!否则Post请求无法进行跨域!
    # 在发送Post跨域请求前,会以Options方式发送预检请求,服务器接受时才会正式请求
    if ($request_method = 'OPTIONS') {
        add_header 'Access-Control-Max-Age' 1728000;
        add_header 'Content-Type' 'text/plain; charset=utf-8';
        add_header 'Content-Length' 0;
        # 对于Options方式的请求返回204,表示接受跨域请求
        return 204;
    }
}
但如果后端是采用分布式架构开发的,有时候RPC调用也需要解决跨域问题,不然也同样会出现无法跨域请求的异常,因此可以在你的后端项目中,通过继承HandlerInterceptorAdapter类、实现WebMvcConfigurer接口、添加@CrossOrgin注解的方式实现接口之间的跨域配置。
6、配置SSL证书
要配置NGINX使用SSL证书,可以按照以下步骤进行操作:
-
获取SSL证书:首先,需要从权威的SSL证书颁发机构(CA)获取SSL证书。可以选择购买商业证书或使用免费的证书颁发机构(如Let’s Encrypt)。
-
安装SSL证书:将获得的SSL证书文件(通常包括.crt和.key文件)上传到服务器上。确保将它们放置在安全的位置,并且只有具有适当权限的用户可以访问这些文件。
-
编辑NGINX配置文件:打开NGINX的配置文件,通常是/etc/nginx/nginx.conf或/etc/nginx/conf.d/default.conf。
-
添加HTTPS服务器块:在配置文件中找到HTTP服务器块,并在其下方添加一个新的HTTPS服务器块。以下是一个示例配置:
server {
    listen 80;
    server_name 192.168.213.4;

    # 将HTTP请求重定向到HTTPS
    return 301 https://$host$request_uri;
}

server {
    listen 443 ssl;
    server_name 192.168.213.4;

    ssl_certificate /path/to/your/certificate.crt;
    ssl_certificate_key /path/to/your/private.key;

    # 可选配置:配置加密套件和其他SSL参数
    ssl_protocols TLSv1.2 TLSv1.3;
    ssl_ciphers 'ECDHE-ECDSA-AES256-GCM-SHA384:ECDHE-RSA-AES256-GCM-SHA384';
    ssl_prefer_server_ciphers on;

    # 其他配置指令...
}