一、nginx科普:
Nginx (engine x) 是一个高性能的
HTTP和
反向代理服务器,也是一个IMAP/POP3/SMTP
服务器。Nginx是由伊戈尔·赛索耶夫为
俄罗斯访问量第二的Rambler.ru站点(俄文:Рамблер)开发的,第一个公开版本0.1.0发布于2004年10月4日。
其将
源代码以类BSD许可证的形式发布,因它的稳定性、丰富的功能集、示例配置文件和低系统资源的消耗而
闻名。2011年6月1日,nginx 1.0.4发布。
Nginx是一款
轻量级的
Web 服务器/
反向代理服务器及
电子邮件(IMAP/POP3)代理服务器,并在一个BSD-like 协议下发行。其特点是占有内存少,
并发能力强,事实上nginx的并发能力确实在同类型的网页服务器中表现较好,中国大陆使用nginx网站用户有:百度、
京东、
新浪、
网易、
腾讯、
淘宝等。
上面的信息来源于百度百科
二、反向代理:
根据反向代理的书写格式,我把反向代理归类为 :端口反向代理,路径反向代理。
环境 window nginx(端口8080) phpstudy(端口80)
1)路径反向代理:
worker_processes 4;
error_log logs/error.log debug;
worker_rlimit_nofile 51200;
events {
worker_connections 51200;
}
http {
server {
listen 8080;
location / {
root html;
}
location /stat {
rtmp_stat all;
rtmp_stat_stylesheet stat.xsl;
}
location /stat.xsl {
root html;
}
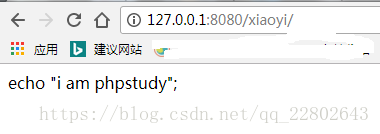
location /xiaoyi/ {
index index.php index.html login.php;
proxy_pass http://127.0.0.1:80/;
}
}
}location /xiaoyi/ {
index index.php index.html login.php;
proxy_pass http://127.0.0.1:80/;
}
}
}描述:上面nginx配置文件监控8080端口 ;定义了一个路径反向代理xiaoyi 当我们方位http://127.0.0.1/8080/xiaoyi/链接时,实际上是访问的是http://127.0.0.1:80/的链接

2)端口反向代理
直接上配置文件:
worker_processes 4;

#切换自动推送(多 worker 直播流)模式。默认为 off
rtmp_auto_push on;

#当 worker 被干掉时设置自动推送连接超时时间。默认为 100 毫秒
rtmp_auto_push_reconnect 1s;

error_log  logs/error.log debug;

worker_rlimit_nofile 51200;

events {

    worker_connections  51200;
}

rtmp {
    server {
        listen 1935;

        application live {
            #live on;
		live on;
		hls on;
		hls_path temp/hls;
          	hls_fragment 20s;
          	hls_playlist_length 3000s;
          	hls_cleanup off;
		idle_streams off;
		publish_notify on;
		drop_idle_publisher 70s;
	  	record_unique off;
		#record keyframes;
		wait_video off;
		interleave on;
		wait_key off;
		record all;
		record_path temp/hls;
		record_interval 3600s;

        }

        application hls {
            live on;
            hls on;
            hls_path temp/hls;
            hls_fragment 1s;
        }
    }
}

http {
    server {
        listen      8080;

        location / {
            root html;
        }

        location /stat {
            rtmp_stat all;
            rtmp_stat_stylesheet stat.xsl;
        }

        location /stat.xsl {
            root html;
        }

        location /hls {
            #server hls fragments
            types{
                application/vnd.apple.mpegurl m3u8;
                video/mp2t ts;
            }
            alias temp/hls;
            expires -1;
        }
	location /xiaoyi/ {
	 	index index.php index.html login.php;
	 	proxy_pass  http://127.0.0.1/;
         }
    }
    include vhost/*.conf;
}include vhost/*.conf;
}
为了方便管理主机,我把主机配置文件全部放在了单独的目录下include方式引入入配置文件
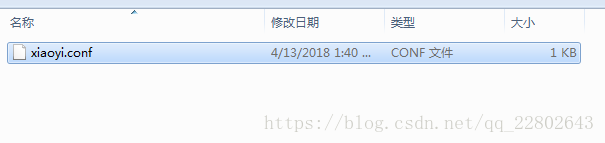
内容为:
#xiaoyi
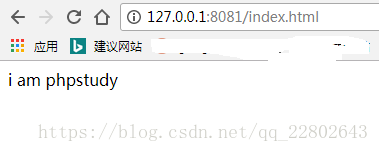
server{
listen 8081;
server_name 127.0.0.1 localhost;
charset utf-8;
location =/ {
rewrite / /index.html permanent;
}
location / {
proxy_pass http://127.0.0.1:80/;
proxy_redirect default;
}
location ~* ^.+.(ico|gif|jpg|jpeg|png|html)$ {
root D:\phpStudy\WWW;
}
location ~* ^.+.(css|js|txt|xml|swf|wav|json)$ {
root D:\phpStudy\WWW;
}
}访问效果:
#配置java后端反向代理
server {
        listen        80;
        server_name  localhost;
        root   "E:/www";
        location / {
            index index.php index.html;
            error_page 400 /error/400.html;
            error_page 403 /error/403.html;
            error_page 404 /error/404.html;
            error_page 500 /error/500.html;
            error_page 501 /error/501.html;
            error_page 502 /error/502.html;
            error_page 503 /error/503.html;
            error_page 504 /error/504.html;
            error_page 505 /error/505.html;
            error_page 506 /error/506.html;
            error_page 507 /error/507.html;
            error_page 509 /error/509.html;
            error_page 510 /error/510.html;
            autoindex  off;
        }
        location ~ \.php(.*)$ {
            fastcgi_pass   127.0.0.1:9000;
            fastcgi_index  index.php;
            fastcgi_split_path_info  ^((?U).+\.php)(/?.+)$;
            fastcgi_param  SCRIPT_FILENAME  $document_root$fastcgi_script_name;
            fastcgi_param  PATH_INFO  $fastcgi_path_info;
            fastcgi_param  PATH_TRANSLATED  $document_root$fastcgi_path_info;
            include        fastcgi_params;
        }
        location  ^~ /apis/ {
	         proxy_set_header Host $host;
	        proxy_set_header  X-Real-IP        $remote_addr;
	        proxy_set_header  X-Forwarded-For  $proxy_add_x_forwarded_for;
	        proxy_set_header X-NginX-Proxy true;
	        # 重写url
	        rewrite ^/apis/(.*)$ /$1 break;
	        proxy_pass http://project;
        }
}
upstream project {
    server 192.168.14.16:81;
}


#前端调用
<!DOCTYPE html>
<html lang="en">
<head>
    <meta charset="UTF-8">
    <meta http-equiv="X-UA-Compatible" content="IE=edge">
    <meta name="viewport" content="width=device-width, initial-scale=1.0">
    <script src="./jquery.min.js"></script>
    <title>Document</title>
</head>
<body>

</body>
<script>
 $(function(){
   let data = {
  	 "username":"xiaoyi","password":"123456"
   }
    $.ajax({
        type: "post",
        contentType :'application/json',
        url: "http://127.0.0.1:80/apis/sys/login",
        data:JSON.stringify(data),
        dataType: "json",
        success: function(result) {
            console.log(result)
        }
      });

 })
</script>
</html>